
The Tone Curve
The tone curve is a powerful tool in Adobe Lightroom that can help you adjust the contrast and tonality of your images. Here are some tips on how to effectively use the tone curve in Lightroom:
Understand the Tone Curve: The tone curve is a graph that represents the tonal range of your image. The left side represents the shadows, the middle represents the mid-tones, and the right side represents the highlights. The horizontal axis represents the input values, while the vertical axis represents the output values.
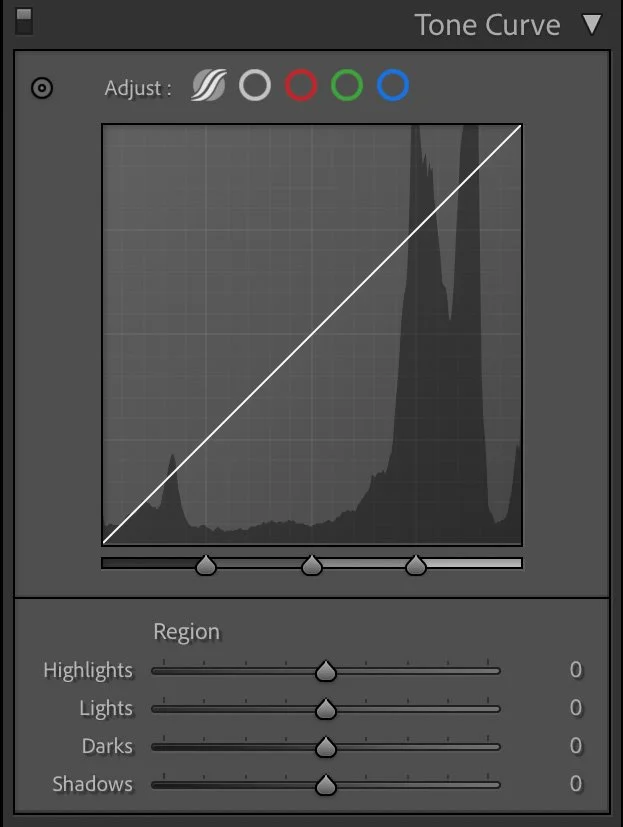
The Tone Curve in Adobe Lightroom.
Adjust the Shadows and Highlights: By dragging the points on the bottom left and top right of the curve, you can adjust the shadows and highlights of your image. Dragging the bottom left point upwards will brighten the shadows, while dragging the top right point downwards will darken the highlights.
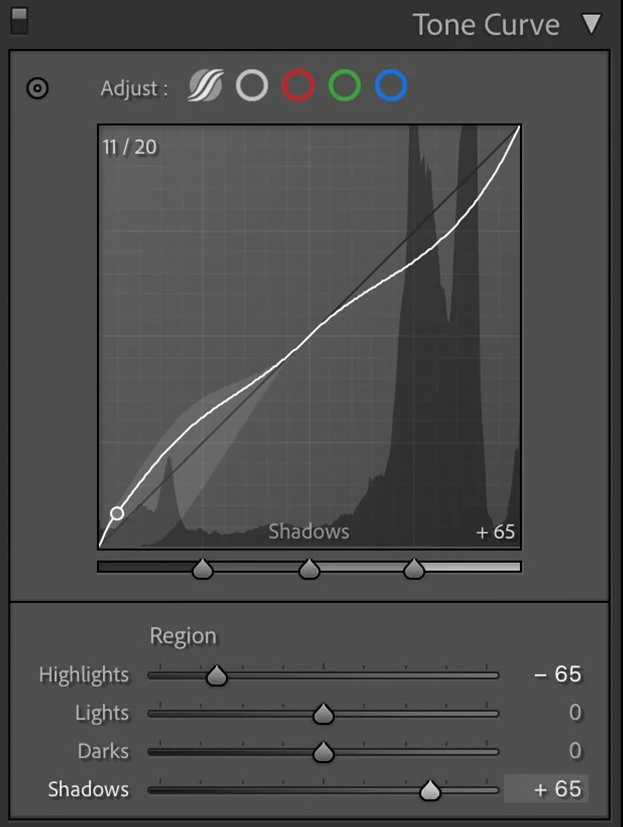
Pulling up the shadows on the left of the tone curve brightens the darker areas of an image, thus making black tones more grey, whereas, pulling down the curve on right darkens the brightest tones and makes them grey as well.
Adjust the Midtones: By dragging the middle of the curve up or down, you can adjust the mid-tones of your image. Dragging the curve upwards will lighten the mid-tones, while dragging it downwards will darken them.
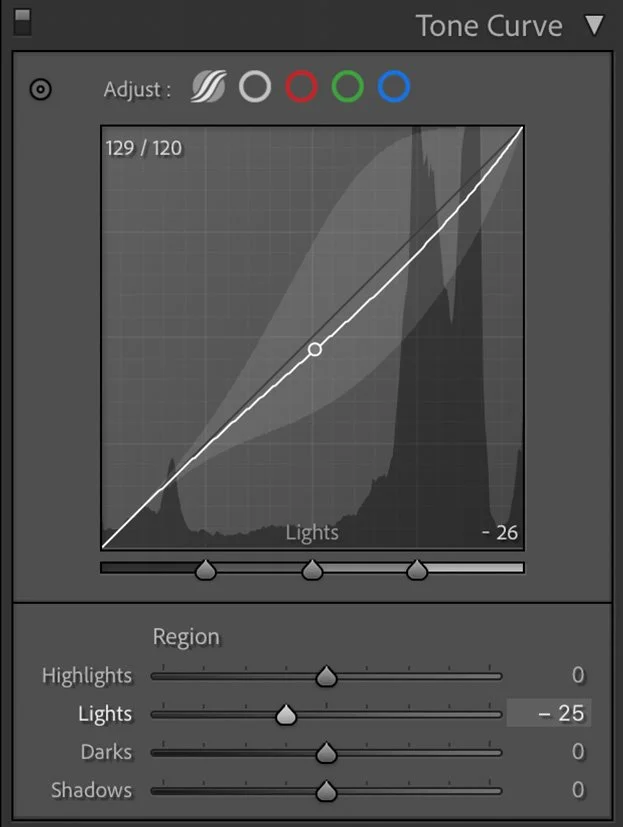
The Mid-tones are (you guessed it) located in the middle of the tone curve.
Use the Point Curve Mode: The point curve mode allows you to make more precise adjustments to the tone curve. By clicking and dragging points on the curve, you can adjust the tonality of specific areas of your image.
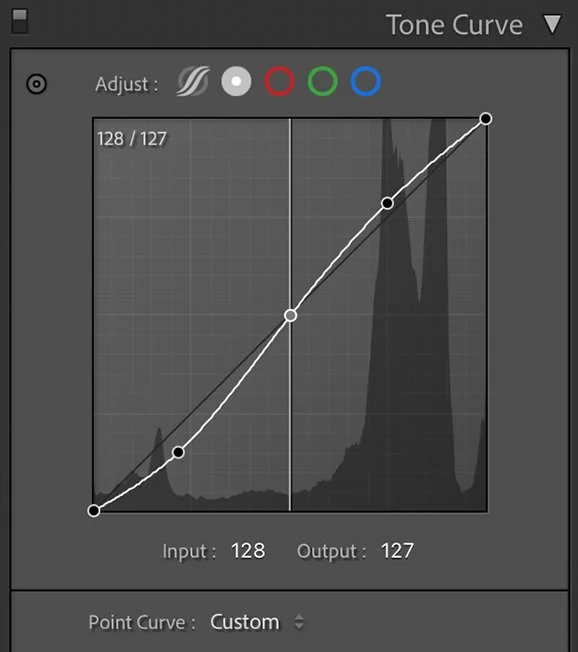
The Point Curve mode allows the user to add as many points as they like and are not limited to only Shadows, Darks, Lights and Highlights. This makes it more specific and precise.
Use the Targeted Adjustment Tool: The targeted adjustment tool is a great way to make quick adjustments to the tone curve. Simply click on the tool (located in the top left corner of the tone curve panel) and then click and drag on the area of the image you want to adjust. Moving the mouse up or down will adjust the brightness or darkness of that area.
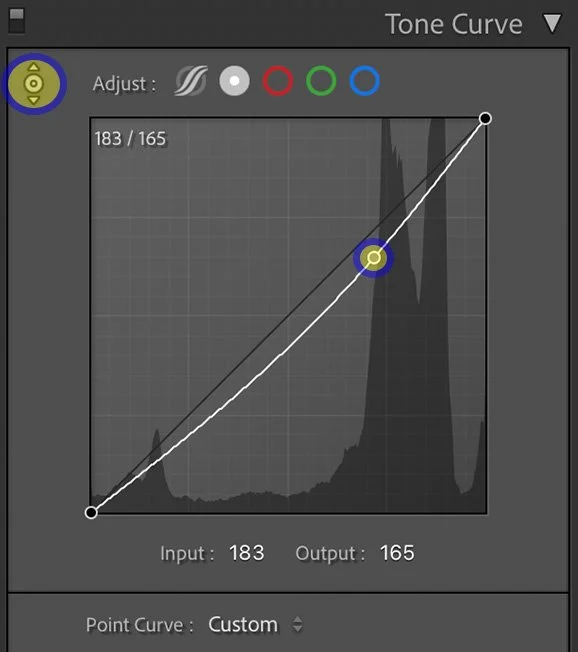
Using the Targeted Adjustment Tool allows the user to select a specific spot in the image, which makes it very precise and intuitive.
Experiment and Practice: The best way to get comfortable with the tone curve is to experiment and practice. Try making small adjustments to your images and see how they affect the overall tonality. With practice, you’ll be able to use the tone curve to fine-tune the contrast and tonality of your images with ease.
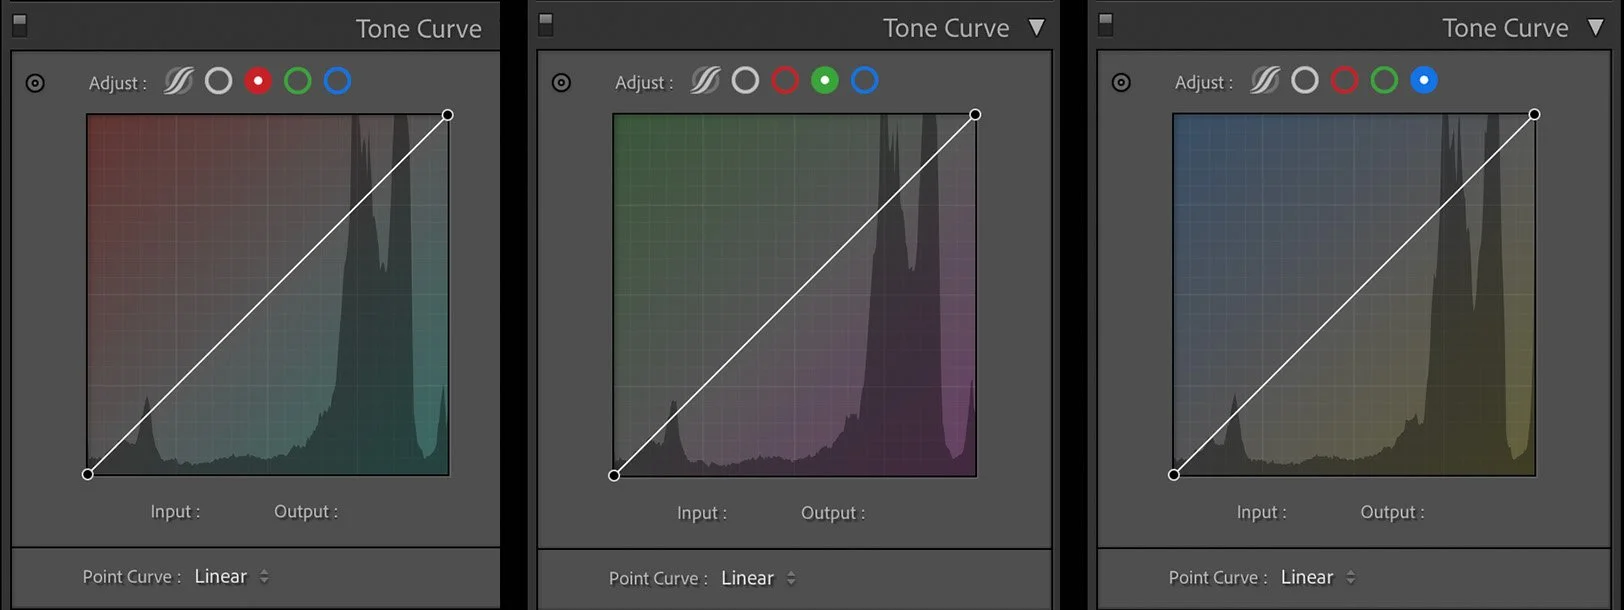
The Tone Curve can also specifically target the RGB (Red, Green, Blue) color channels individually where moving the curve up or down will add a specific color into the image while removing its opposite color (For Example - adding Red means removing Greens).
In conclusion, the tone curve is a powerful tool in Lightroom that can help you adjust the contrast and tonality of your images. By understanding the tone curve and experimenting with its various settings, you can fine-tune your images to achieve the desired look and feel.
I have made a short video showing how to use the Tone Curve in Adobe Lightroom. Check it out to see the Tone Curve in action.